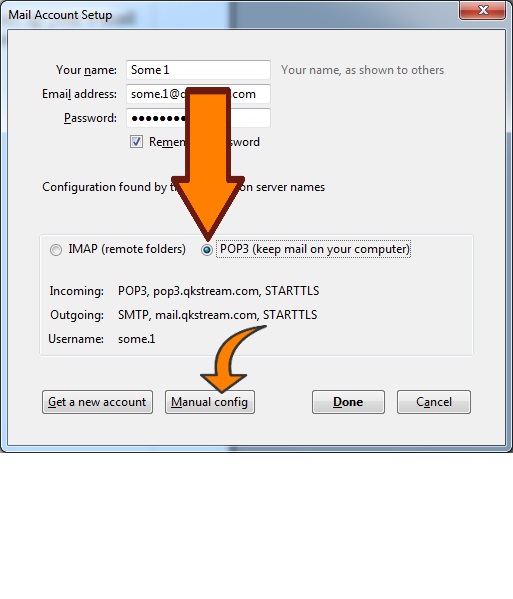
3. The Mail Account Setup screen will show up next you will need to select POP3 and then select Manual Config.
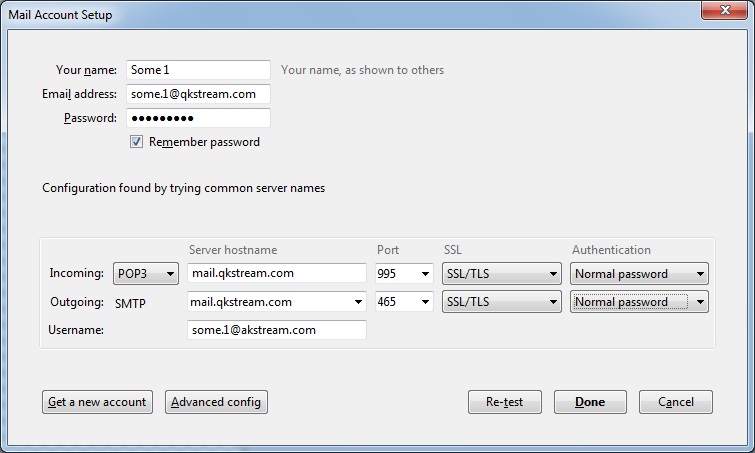
4. The next screen is very important here we will input the incoming and outgoing server settings. The Incoming Server should be set as mail.qkstream.com port 995 then select SSL and for authentication choose Normal Password. The settings are the same for the outgoing server however the port must be set to 465. Make sure your screen matches ours here.
5. Once the information has been entered the Done button will highlight click Done.
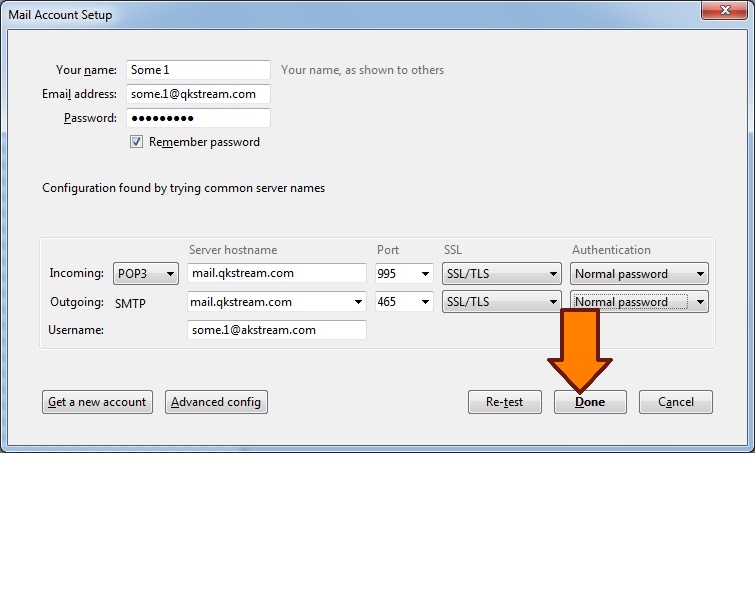
6. After clicking Done it will check your passwords and server settings this may take a few minutes. Once it has finished your E-mail account will be set-up and ready to send and receive.
